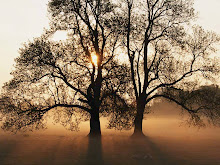
I will show you how i turned this photo
 to this one....


to this one....1. Open the image with photoshop. Copy the background layer, pressing CTRL+J.
2. View the ruler. Go to View>Ruler or press CTRL+R.
 3. Drag the ruler to location where you want the image to split. I decide to have three horizontal split.
 4. Click Rectangular Marquee from the tool palette and select the first row. Press the CTRL+J in the keyboard to have a copy of the selection in its own layer. I named that layer as “first”.

 6. Again, back to Layer 1, select the last split and press CTRL+J and named it “third”.
 7. Now, the three splits have their own layer. I want to add a little bit increase with my canvas. So, select the Crop tool from the tool palette and drag it over the entire image. In the lowermost right corner, click hold and drag while pressing the ALT key to adjust to new canvas size and then click the image and select Crop. And make sure that it is in the default foreground-background color; otherwise press D in your keyboard. (black would be the foreground and white would be the background). The adjusted canvas would now be white in background.

Then click also the Drop Shadow and I make these adjustments. Then click OK.

9. With still the Layer “first selected, I will now copy the layer style to be applied for the rest two splits. Go to Layer>Layer Style>Copy Layer Style. Then select the Layer “second” and go to Layer>Layer Style>Paste Layer Style. The layer style now for the first is already applied for my second split. Repeat the same procedure with the Layer “third”.
 10. I decided to get rid of the ruler. I will adjust now each split. But first I will hide the Layer 1 and the background layer, so the background now becomes transparent.

 So there I have it. A single image turned into three splitting object.
I think this is simple and you can do this also. You can apply as many splits as you. It can be vertical or horizontal and even several boxes of splits. This is fun. So start splitting your photo now and enjoy it in your layout.
Hope you had learned and fun! Happy reading!
3. Drag the ruler to location where you want the image to split. I decide to have three horizontal split. 4. Click Rectangular Marquee from the tool palette and select the first row. Press the CTRL+J in the keyboard to have a copy of the selection in its own layer. I named that layer as “first”. 5. Then going back to our Layer 1, with the marquee tool, select for the second row and press CTRL+J and named it as “second”.
6. Again, back to Layer 1, select the last split and press CTRL+J and named it “third”.7. Now, the three splits have their own layer. I want to add a little bit increase with my canvas. So, select the Crop tool from the tool palette and drag it over the entire image. In the lowermost right corner, click hold and drag while pressing the ALT key to adjust to new canvas size and then click the image and select Crop. And make sure that it is in the default foreground-background color; otherwise press D in your keyboard. (black would be the foreground and white would be the background). The adjusted canvas would now be white in background.8. Now, I am going to add some layer style. With the Layer “first” selected, click the Add Layer Style icon below the Layer palette and select stroke. I use the following settings:
Then click also the Drop Shadow and I make these adjustments. Then click OK.
9. With still the Layer “first selected, I will now copy the layer style to be applied for the rest two splits. Go to Layer>Layer Style>Copy Layer Style. Then select the Layer “second” and go to Layer>Layer Style>Paste Layer Style. The layer style now for the first is already applied for my second split. Repeat the same procedure with the Layer “third”.
10. I decided to get rid of the ruler. I will adjust now each split. But first I will hide the Layer 1 and the background layer, so the background now becomes transparent.Select the Layer “first”, press CTRL+T and start rotating it. Then, select the Layer “second” and again press CTRL+T, I transform it opposite to the layer “first”. And lastly, the Layer “third”, CTRL+T, would be this way.
So there I have it. A single image turned into three splitting object.I think this is simple and you can do this also. You can apply as many splits as you. It can be vertical or horizontal and even several boxes of splits. This is fun. So start splitting your photo now and enjoy it in your layout.
Hope you had learned and fun! Happy reading!


 Click the foreground and I set it to #004a80. Then press ALT+Backspace to fill the layer.
 I applied texture to the filled layer to appear it as a canvas. Go to FILTER>Texture>Texturizer. I use the following settings:
 3. Make your text
 4. Select the text
 5. Create Work Path
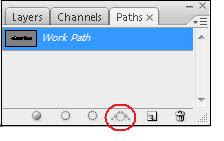 The text now will have a white line around the text, meaning it is now the work path I made out of the selection.
 6. Add another layer
 7. Set your brush

 8. Create now your stitches
 Click for the Stroke Path from this drop down menu.
 Select the brush and uncheck the Simulate Pressure.
 Practice now your name. Start stitching your name or any other text or even your image, you can stitch them around, too. Happy reading!